# MathCAD
# Инструкция по установке MathCAD 14.0 M011
Для корректной работы продуктов необходимо изменить настройки локальной сети:
Пуск → Панель управления → Сетевые подключения → Подключения по локальной сети → Свойства → протокол интернета (TCP/IP) → Свойства → Дополнительно → WINS → Добавить и прописываем 192.168.200.18 → ОК → ОК → Закрыть → Закрыть.
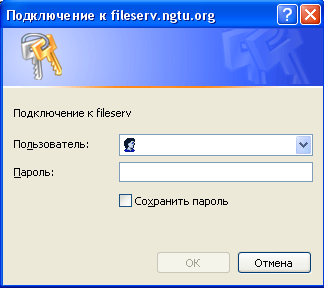
Пуск → Выполнить → \\\\data.nntu.ru\\Products\\MatCad 14.0
Открывается окно:
[](https://help.nntu.ru/uploads/images/gallery/2026-11/mathcad-14-1.png)
В строке ***пользователь*** вводите: setup
В строке ***пароль*** вводите: Lf,jhfnjhbz2009 (Лаборатория2009 - на английской раскладке русскими буквами)
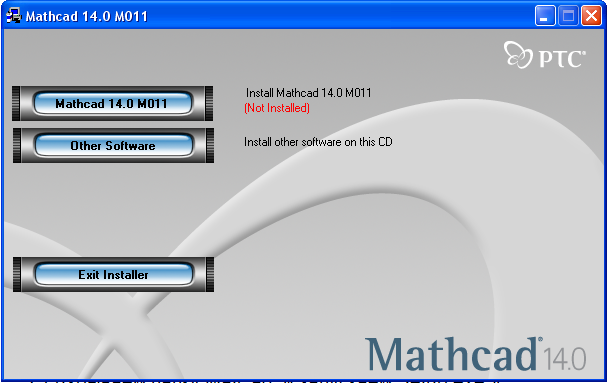
Запускаем Setup.exe
Открывается окно
[](https://help.nntu.ru/uploads/images/gallery/2026-11/mathcad-14-2.png)
Нажимаем кнопку Mathcad 14.0 M011
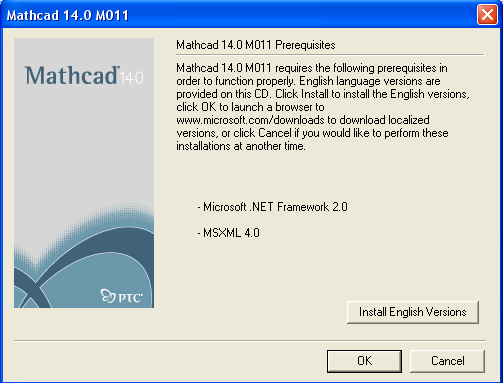
Открывается окно
[](https://help.nntu.ru/uploads/images/gallery/2026-11/mathcad-14-3.png)
Нажимаем кнопку Install English Version
В следующем окне нажимаем кнопку Далее.
В следующем окне ставим галочку в графе "Я принимаю условия лицензионного соглашения", и нажинаем кнопку "Установить". В следующем окне нажимаем кнопку "Готово".
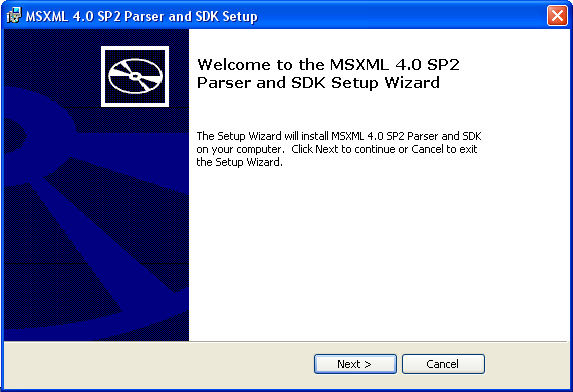
Открывается окно.
[](https://help.nntu.ru/uploads/images/gallery/2026-11/mathcad-14-4.png)
Нажимаем кнопку Next >
В следующем окне ставим галочку в графе "I accept the terms in the License Agreement" и нажимаем кнопку Next >
В следующем окне нажимаем кнопку Next >
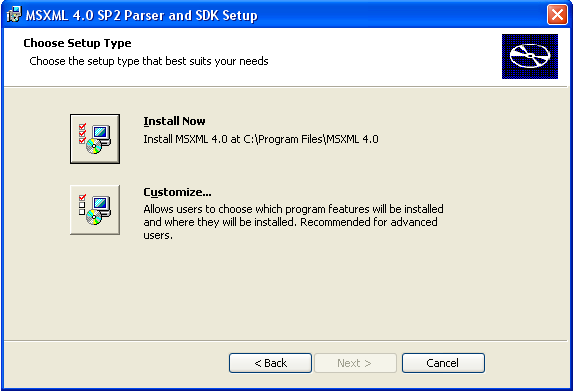
Открывается окно
[](https://help.nntu.ru/uploads/images/gallery/2026-11/mathcad-14-5.png)
Нажимаем кнопку Install Now
В следующем окне нажимаем кнопку Finish.
В следующем окне нажимаем кнопку Next >
В следующем окне ставим галочку в графе "I accept the terms in the License Agreement" и нажимаем кнопку Next >
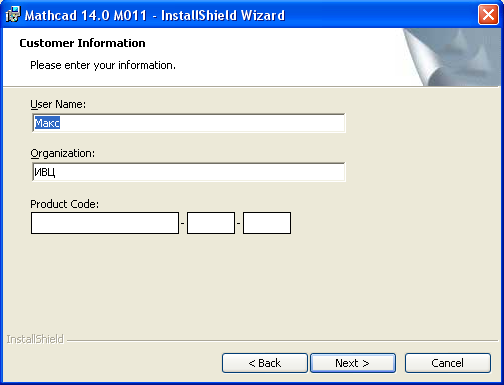
Открывается окно
[](https://help.nntu.ru/uploads/images/gallery/2026-11/mathcad-14-6.png)
В строку Product Code вводим: SE14RYMMEV0002-FLEX-ACAD
Остальные строки оставляем без изменения.
Нажимаем кнопку Next >
В следующем окне нажимаем кнопку Next >
В следующем окне нажимаем кнопку Install
В следующем окне нажимаем кнопку Finish
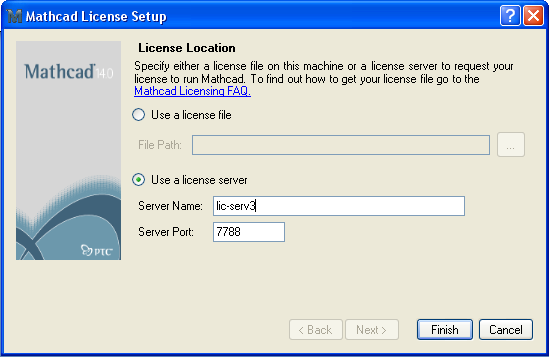
Открывается окно
[](https://help.nntu.ru/uploads/images/gallery/2026-11/mathcad-14-7.png)
Ставим галочку в строке Use a license server
В строке Server name пишем: lic1 (картинка не соответствует действительности)
И нажимаем кнопку Finish
В следующем окне нажимаем кнопку ОК.
# Инструкция по установке MathCAD 15.0 M010
1. Для установки MathCad 15.0 M010 необходимо изменить настройки локальной сети
Пуск → Панель управления → Сетевые подключения → Подключение по локальной сети → Свойства → протокол интернета (TCP/IP) → Свойства → Дополнительно → WINS → Добавить и прописываем 192.168.200.18 → ОК → ОК → Закрыть → Закрыть
2. Пуск Выполнить \\\\data.nntu.ru\\Products\\MathCad 15.0
3. Открывается окно:
[](https://help.nntu.ru/uploads/images/gallery/2026-11/mathcad-14-1.png)
В строке ***пользователь*** вводите: setup
В строке ***пароль*** вводите: Kf,jhfnjhbz2009 (Лаборатория2009 - на английской раскладке русскими буквами)
4. Запускаем Setup.exe
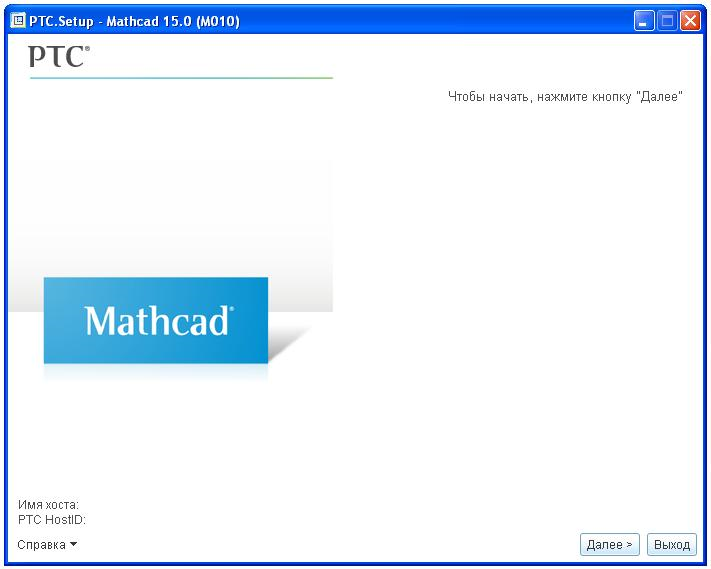
5. Открывается окно, нажимает кнопку "Далее"
[](https://help.nntu.ru/uploads/images/gallery/2026-11/mathcad-15-1.png)
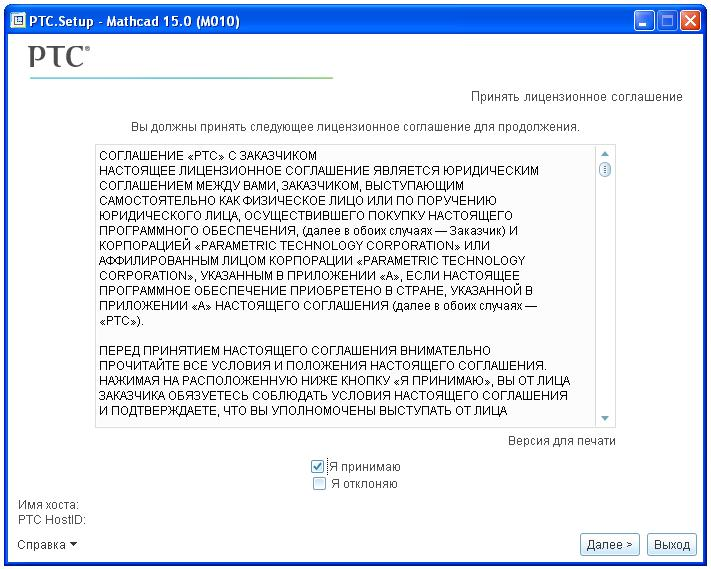
6. Далее появляется окно, ставим галочку "Я принимаю" и нажимаем кнопку "Далее"
[](https://help.nntu.ru/uploads/images/gallery/2026-11/mathcad-15-2.png)
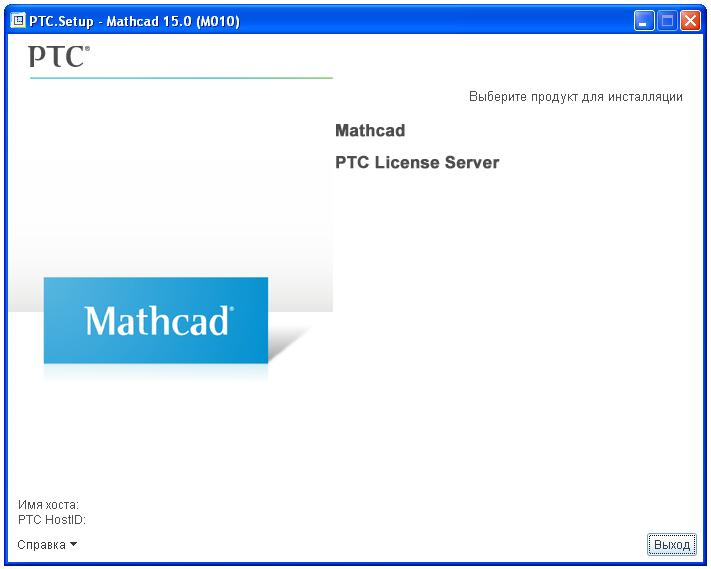
7. Выбираем Mathcad
[](https://help.nntu.ru/uploads/images/gallery/2026-11/mathcad-15-3.png)
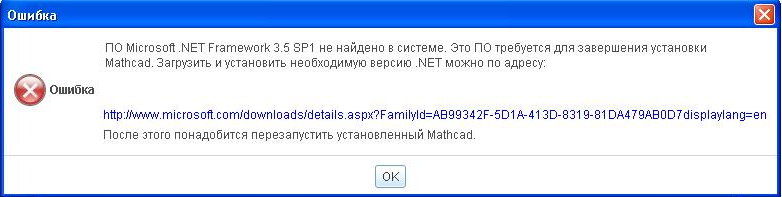
Для работы Mathcad требуется .NET Framework 3.5 SP1, в случае, если он не установлен, появится сообщение. Можно перейти по ссылке, скачать и установить .NET Framework 3.5 SP1, либо из
\\\\backup-synology.nntu.ru\\Products\\MathCad 15.0\\Microsoft .NET Framework 3.5
[](https://help.nntu.ru/uploads/images/gallery/2026-11/mathcad-15-4.png)
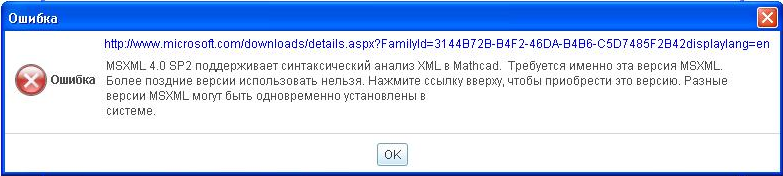
Также понадобится установить MSXML 4.0 SP2. В случае, если не установлен, можно скачать и установить по ссылке, либо из
\\\\backup-synology.nntu.ru\\Products\\Mathcad 15.0\\MSXML 4.0 SP2
[](https://help.nntu.ru/uploads/images/gallery/2026-11/mathcad-15-5.png)
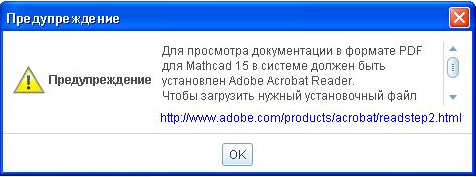
Если не установлен Adobe Reader, для просмотра документации желательно установить данный продукт.
[](https://help.nntu.ru/uploads/images/gallery/2026-11/mathcad-15-6.png)
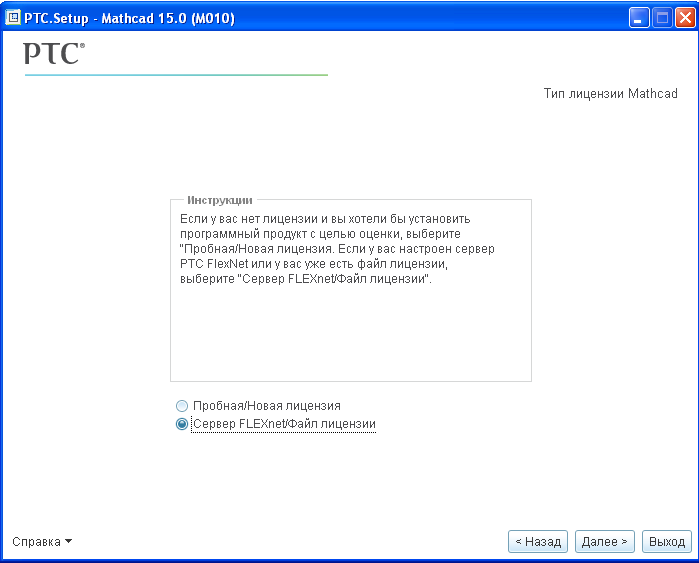
8. Выбираем пункт "Сервер FLEXnet/Файл лицензии", нажимаем кнопку "Далее"
[](https://help.nntu.ru/uploads/images/gallery/2026-11/mathcad-15-7.png)
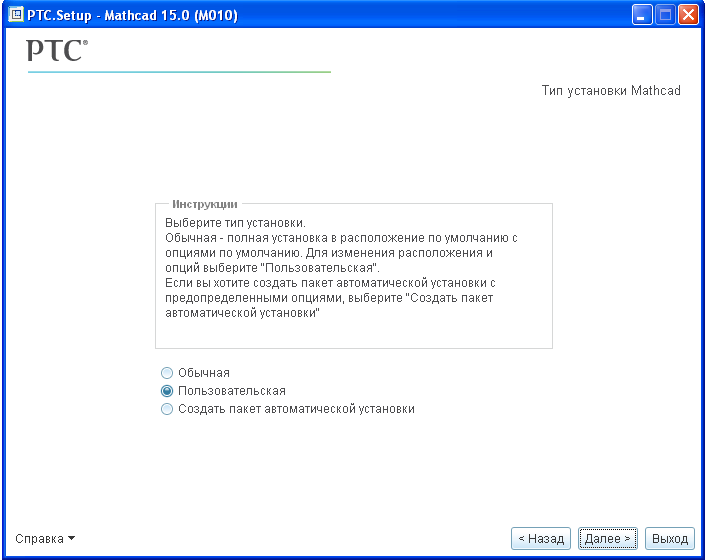
9. Выбираем пункт "Пользовательская", нажимаем кнопку "Далее"
[](https://help.nntu.ru/uploads/images/gallery/2026-11/mathcad-15-8.png)
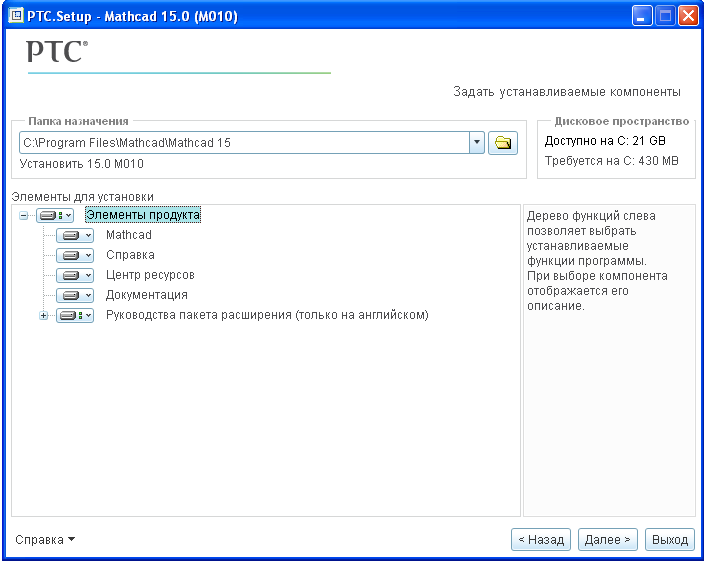
10. Элементы для установки оставляем по умолчанию, нажимаем кнопку "Далее"
[](https://help.nntu.ru/uploads/images/gallery/2026-11/mathcad-15-9.png)
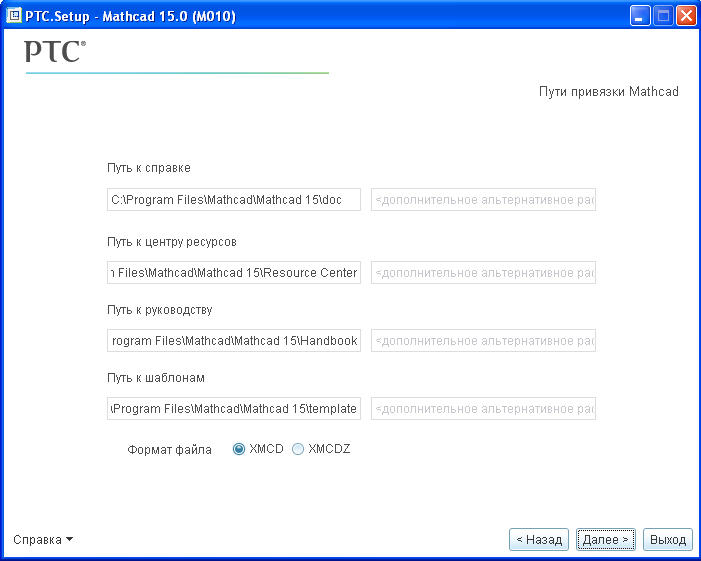
11. Пути привязки оставляем по умолчанию, нажимаем кнопку "Далее"
[](https://help.nntu.ru/uploads/images/gallery/2026-11/mathcad-15-10.png)
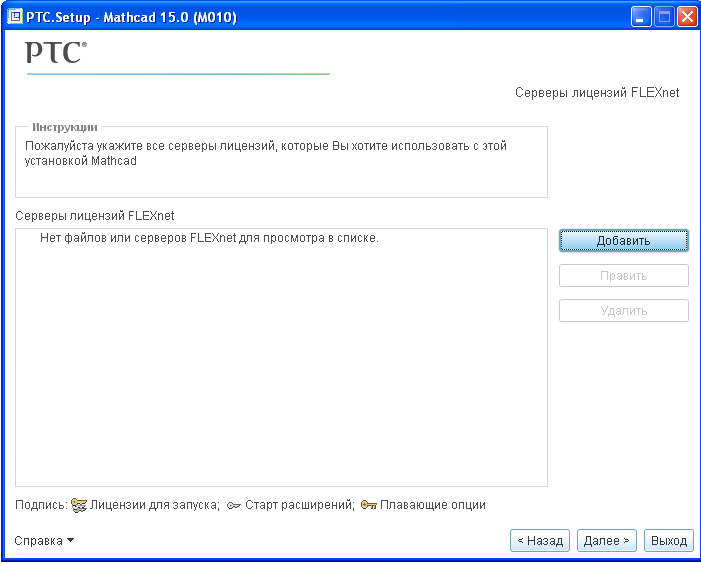
12. В окне "Серверы лицензий FLEXnet" нажимаем кнопку "Добавить"
[](https://help.nntu.ru/uploads/images/gallery/2026-11/mathcad-15-11.png)
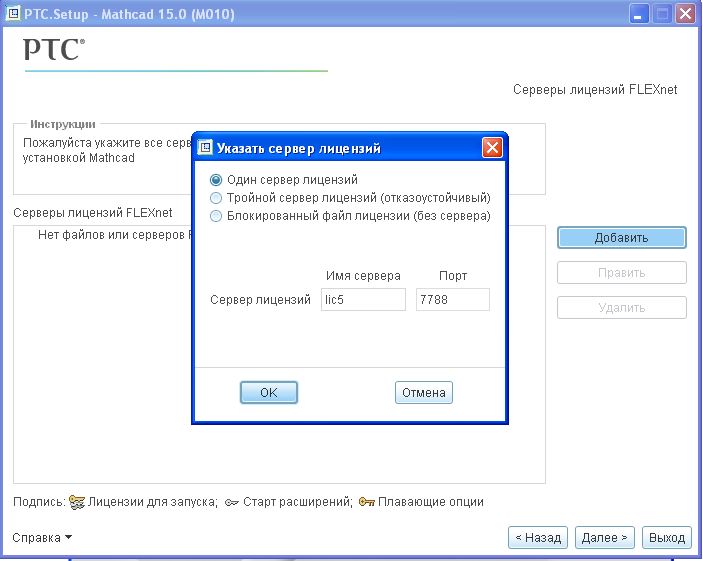
13. Выбираем пункт "Один сервер лицензий", прописываем имя сервера lic5
[](https://help.nntu.ru/uploads/images/gallery/2026-11/mathcad-15-12.png)
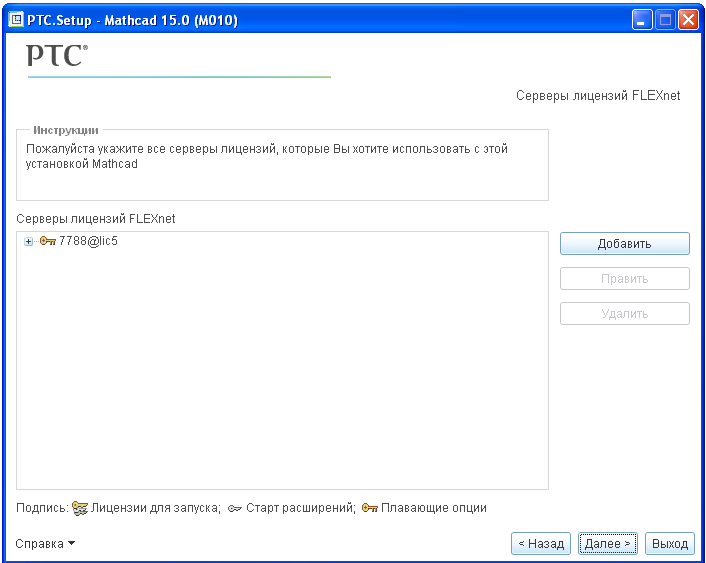
14. Нажимаем кнопку "Далее"
[](https://help.nntu.ru/uploads/images/gallery/2026-11/mathcad-15-13.png)
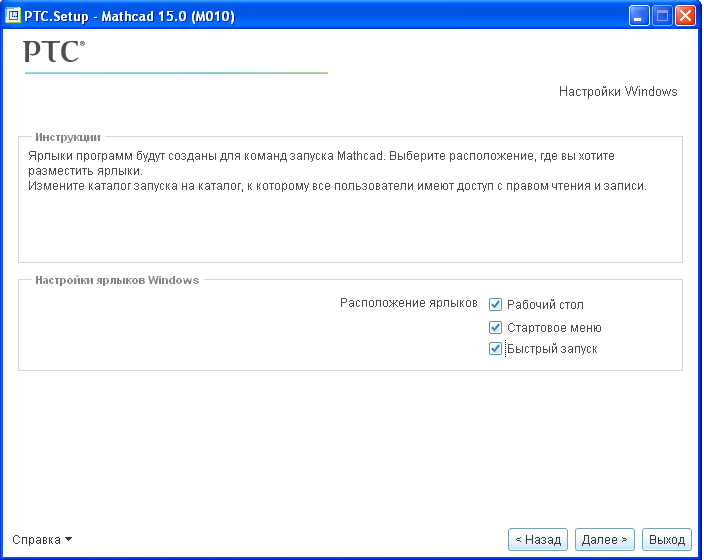
15. Оставляем по умолчанию, нажимаем кнопку "Далее"
[](https://help.nntu.ru/uploads/images/gallery/2026-11/mathcad-15-14.png)
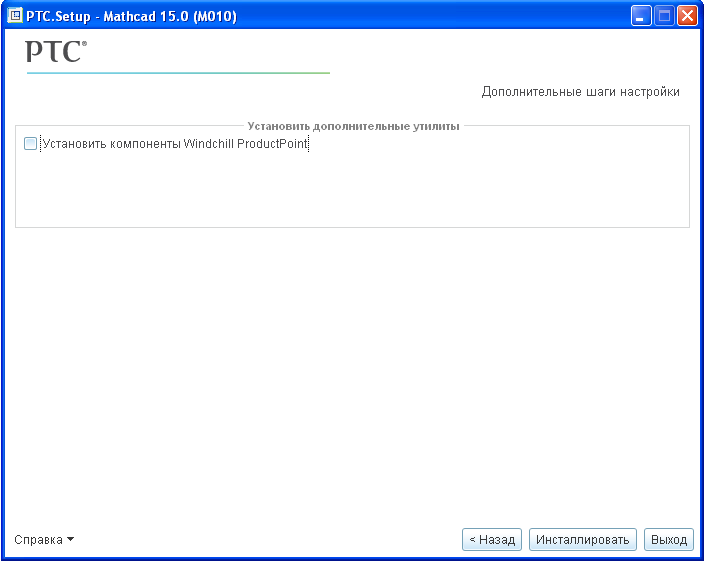
16. Снимаем галочку "Установить компоненты Windchill ProductPoint" ит нажимаем кнопку "Инсталлировать"
[](https://help.nntu.ru/uploads/images/gallery/2026-11/mathcad-15-15.png)
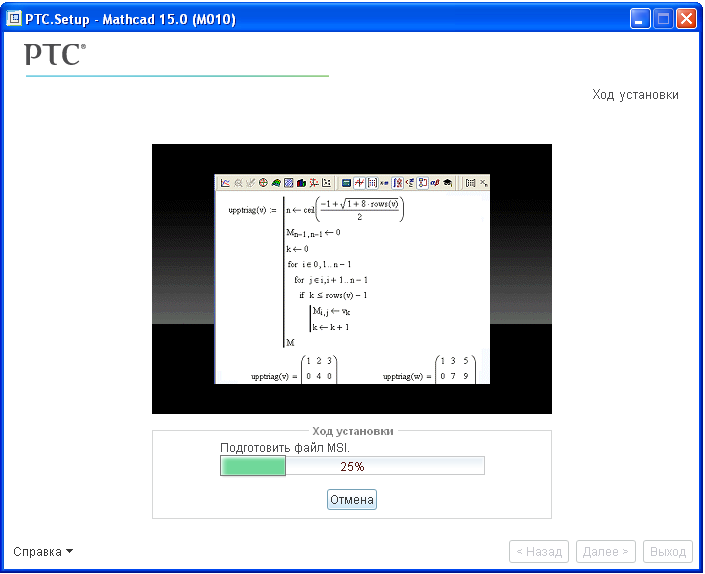
17. Началась установка Mathcad
[](https://help.nntu.ru/uploads/images/gallery/2026-11/mathcad-15-16.png)
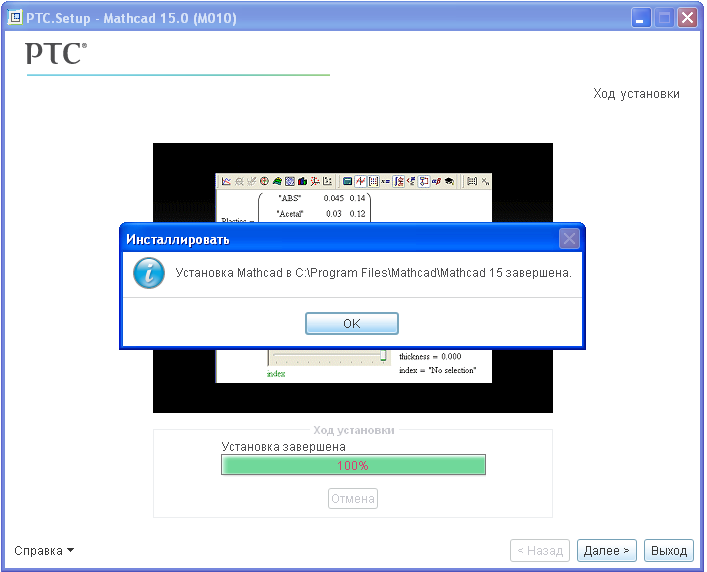
18. Установка Mathcad завершена
[](https://help.nntu.ru/uploads/images/gallery/2026-11/mathcad-15-17.png)